The best time for trimming forsythia is in the spring after the blooms fade. Pruning forsythia in late summer or fall will reduce the number of flowers in the spring since these shrubs bloom on old wood and set their flower buds soon after new growth appears.

How to Trim Forsythia…. There are a few things to remember before you begin pruning. Forsythia’s have a natural arching habit in an irregular rounded shape and forsythia pruning should allow for this natural growth. Pruning forsythia into a formal hedge will remove most of the shrubs flowering potential. In a mature forsythia shrub, cut at least one-fourth to one-third of the oldest, thickest branches close to the ground. For the very oldest and most overgrown forsythia, pruning should be brutal, cropping the entire shrub to about 4 inches from the ground. New shoots will emerge and with careful trimming, forsythia can be renewed and rejuvenated. Within two years, you’ll have a new shrub. Younger forsythia shrubs are easier to maintain with regular care. Take out the oldest branches to make room for new shoots. This also allows more light into the center of the forsythia. Trimming back any straggling growth will go a long way in neatening the look of your shrub. Spend just a few minutes each spring on forsythia pruning and your reward will be many years of spring-is-here smiles.

All that being good…it’s totally acceptable to allow this gorgeous shrub to grow in a uncontrolled fashion….My personal preference is somewhat out of bounds of neat and tidy!!

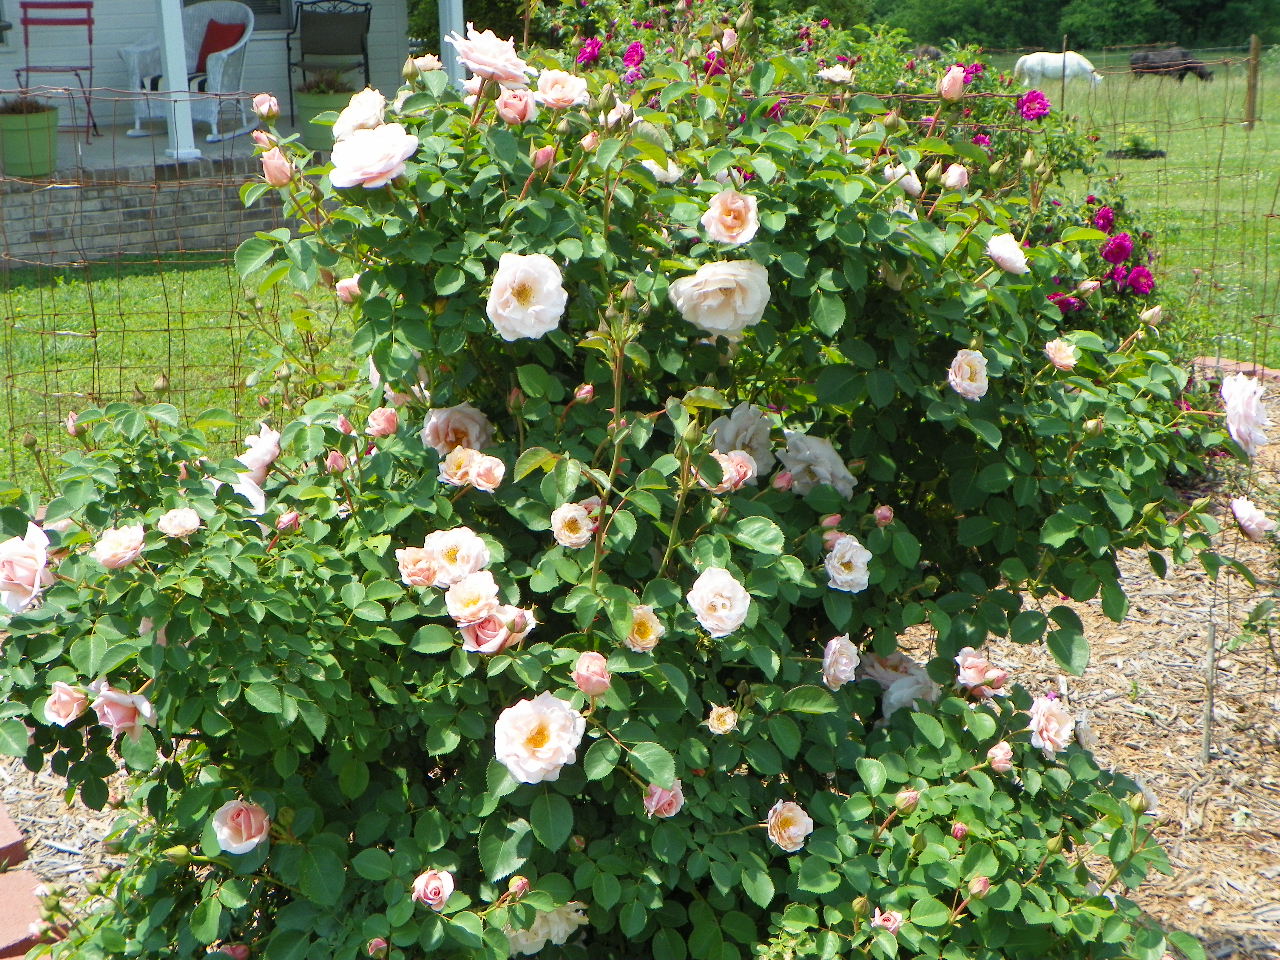
Roses-Secret Of Success~

Unless one is a pro with roses it isn’t uncommon to make a rose bed of many different kinds and then treat them all the same. This is a big mistake…roses are each individual in needs, issues, and output.

It is just as uncommon to find one particular rose with many different issues.
They each seem to have one or two weaknesses that can and often do come calling .

For example…Grandifloria’s are prone to Aphid infestation–look for tiny, green, brown, or white, soft bodied insects-usually on the backs of the leaves.

Sometimes a good spraying with the water hose will destroy these critters and if not, wash gently with a safe insecticidal soap spray…continue this spraying until they are gone.

( another, more natural way to eliminate Aphids is to make sure you have Ladybugs in your garden…they dine constantly on Aphids, and can consume thousands in a just a few hours.) Ladybugs are totally harmless to garden plants…a good bug in every way.

Floribunda’s seem to be a target for Botrytis blight…a fungal disease that appears  as a gray growth on buds. Flowers that are affected will fall apart, rather than open normally.

Pick off and destroy affected blooms and spray with a fungicide in severe cases.
( A good strong compost tea will also control this blight if started early and repeated long enough.)

Hybrid Tea’s are prone to rust and Japanese beetle attacks.
Rust will appear as small brown powdery spots that spread across the leaves. They will eventually turn yellow and fall off. Remove infected leaves and destroy…never drop any infected leaves on the ground under your rose bushes, this will allow the disease to infect the soil and back into the plant. I find a mixture of 1 part white vinegar and 4 parts water will get rid of rust.

Japanese beetles are tricky…they don’t succumb to any known combative…a good hard spraying with the water hose will drive them away, kill some, and if done often enough will discourage them from hanging around.

Don’t use the bags on the market that draws them in and traps them…they love the mixture in the bags and will come from far away to dine on it-so you are just inviting more than you might have otherwise.

You can easily hand pick or knock them off, into a can of oil early in the morning or late in the day…they are sluggish at these times….they can’t get out of the oil and will die.

Do not put these in your compost…they stink and the oil will contaminate your mix.

A good point to always practice…good, clean, chemical free soil is the best guard against any disease in any garden. Bad insects, fungus,

Secret to Rose Success.

etc., don’t like or hang out in good soil. It is the one most important step to having a garden free of problems.


The common belief is that it will not successfully grow outdoors and most who grow it do so inside, in trays, or in greenhouses.

I grew it for three years in raised beds …2 crops per year….one in the spring and one in the early to late fall.

It grew well for me in a deep layer of composted soil with cuttings available about every 10 days.

My reason for growing it was to supply a commercial pet product company and not for human consumption.

I don’t consume Wheatgrass …if I were inclined to do so I would opt instead for Spelt…info below.

It is a personal preference…and that is OK.

It must have temps between 60 and 90 degrees* F…during the growing season….it is highly sensitive to cold and heat outside that range…however, you can control that issue with shade cloth and garden covers if more or less heat is needed.

My thought and teaching is…consuming whole foods, and that certainly includes sprouted foods (healthy in far reaching ways) is a much safer, easier, and benefits are more evenly maintained…versus Juicing. ( Just clarifying for those who know my stance on juicing.)
~~
Wheatgrass is a food prepared from the cotyledons of the common wheat plant
Like most plants, it contains chlorophyll, amino acids, minerals, vitamins, and enzymes. Claims about the health benefits of wheatgrass range from providing supplemental nutrition to having unique curative properties, though few, if any, have been scientifically proven. Because wheatgrass juice is extracted from wheatgrass sprouts, i.e., before the wheat seed begins to form, it is gluten-free.
Wheat grass can be traced back in history over 5000 years, to ancient Egypt and perhaps even early Mesopotamian civilizations.

The consumption of wheatgrass in the Western world began in the 1930s as a result of experiments conducted by Charles Schnabel in his attempts to popularize the plant.[2] By 1940, cans of Schnabel’s powdered grass were on sale in major drug stores throughout the United States and Canada[3]
Ann Wigmore was also a strong advocate for the consumption of wheatgrass as a part of a raw food diet. Wigmore, founder of the Hippocrates Health Institute, believed that wheatgrass, as a part of a raw food diet, would cleanse the body of toxins while providing a proper balance of nutrients as a whole food.
The taste is also influenced by the growing conditions and without precautions the grass can grow moldy.

Spelt grass juice is a tastier alternative to wheatgrass juice with smoother taste, higher nutrition content and deeper green color.

Spelt (Triticum spelta) is a kind of wheat, with a protecting husk around the kernel. Lab tests show that the grass grown out of spelt had almost double as much protein while the amino acid content of it was found five times more than in the common wheatgrass juice. The level of minerals in spelt grass juice also highly exceeded the level in wheatgrass juice.

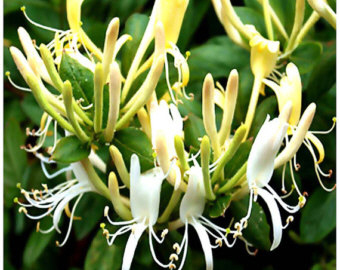
Japanese Honeysuckle (Wild-crafted)

There are over 180 varieties of honeysuckle, which include both deciduous and evergreen types. All varieties have sweet-smelling flowers that range from white and yellow to red.

Japanese HoneysuckleThe most common honeysuckle is the Japanese variety. The vine has deciduous green leaves one to three inches in length and yellow, trumpet-like, two-lipped flowers. The vine can grow in excess of 30 feet and can be supported by a trellis or grow up a structure.

Honeysuckle is an invasive plant, so it must be constantly clipped back so it does not escape from the garden and into the fields. The stems are slightly hairy when new and form a bark as they get a little older. The plant dies back in the winter in cold climates but comes back in the spring. Honeysuckle attracts bees, butterflies and hummingbirds. Japanese honeysuckle is native to Japan and Korea. It was brought to the state of New York in 1806 to be used as a food source for wildlife in the state, and because of its appeal as a plant. It was used to control and prevent earth erosion, and it worked well. In fact, the plant became invasive and had to be controlled after a while.

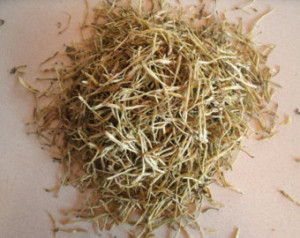
This is the honeysuckle used in Traditional Chinese Medicine for treating the heart and lung meridians. In western herbalism it is a trusted treatment for many forms of arthritis, including rhuematoid and osteo arthritis pain and inflamation. It also is an excellent treatment for gout. This is the stems only, the stem and flower mixture treats upper respiritory ailments. The stem alone is an important medicinal, besides treating joint pain and swelling, it also lowers Blood Pressure, and breaks fevers..

There are two ways to enjoy this and any Wild Crafted Tisane….

Japanese HoneysuckleSteep 1-3 teaspoons of blend in 8-ounces of water that reached a boiling point—cover and steep 5 minutes for sipping pleasure.

For medicinal results steep from 7 to 15 minutes, depending on strength desired. The longer steeped, the stronger the taste/benefits.

Most Wild Crafted herbs/plants are best dried before using. Drying preserves and strengthens the oils/flavors.

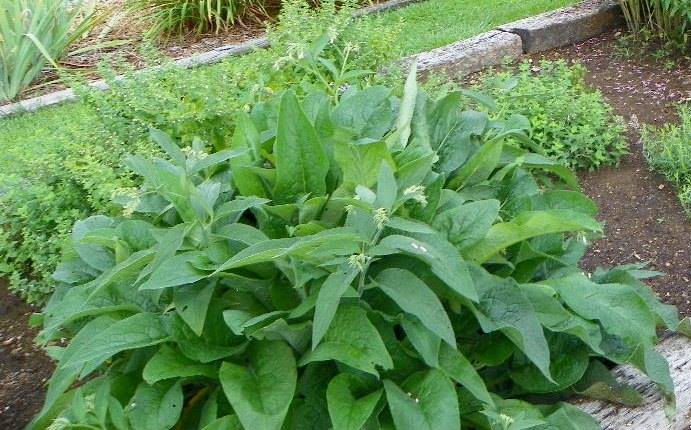
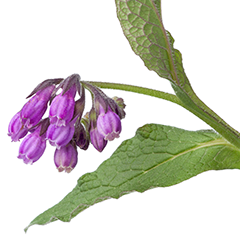
Why Comfrey should be a staple in any natural medicine chest-

ComfreyComfrey is an herb with a long history of healing. In the chariot races of ancient Rome, comfrey leaves were applied to injuries to stop heavy bleeding. And from the time of Alexander the Great to World War I, army medics relied on the herb’s power as a topical treatment for wounds. Native Americans considered comfrey a sacred healing plant and drank it as a tea, as well as using it topically.

In medical texts, comfrey was a staple before the invention of antibiotics, and medical journals described some seemingly miraculous results. Holly Lucille, ND, author of The Healing Power of Trauma Comfrey, recounts some documented cases, including one where comfrey poultices healed a seriously injured foot that otherwise would have been amputated. In another, comfrey poultices healed a seemingly untreatable, malignant tumor on a man’s face.

Recent History
ComfreyLike many herbs, comfrey was replaced by drugs in modern medicine, but it also faced another problem: potential toxicity. In addition to healing components, most comfrey plants contain toxic substances known as a pyrrolizidine alkaloids (PAs), which can harm the liver when ingested. Consequently, comfrey products are sold only for topical use.

According to Lucille, PAs have difficulty crossing the skin barrier, but many comfrey products still carry warnings, especially in the case of open wounds. There are comfrey plants, however, that have been bred to contain no PAs in their leaves, or have had their PAs removed. Some products are also formulated to contain minute amounts of PAs.

In Germany, where comfrey is regulated as a licensed medicine, there are official guidelines for PA levels, and small amounts are considered to be safe. In the US, there are no similar guidelines, and some American herbalists believe that the risk from PAs in comfrey has been inaccurately assessed and overstated. Because some toxicity warnings may be overzealous, the herb has at times been overlooked as a viable natural remedy.

Healing Ingredients
Topical comfrey products can speed up healing of sprains, strains, bruises, sore muscles, pulled ligaments and tendons, cuts and scrapes, and fractures. They can also reduce back and joint pain. The herb’s beneficial substances include:

Allantoin:Promotes wound healing and increases production of white blood cells, which wards off infection. Once absorbed by the skin, allantoin can reach and heal cartilage, tendons, and bones. Allantoin is a key ingredient in many personal care products that help to moisturize and soothe skin.

Rosmarinic Acid: Fights inflammation and swelling, and slows down cell damage. It reduces production of excess fluid by cells in damaged tissues.

Research Highlights
Comfrey creams or ointments tested in studies have typically been those without any PAs, such as Traumaplant Comfrey Cream or German products that aren’t available in the United States. Altogether, published studies have included more than 600 people, including children as young as age 3.

According to a review published in Phytotherapy Research, topical comfrey without PAs is both safe and effective for joint pain and swelling from arthritis, muscle pain, back pain, sprains and strains from sports or other accidents, and for contusions. The reviewers also concluded that it is safe for children age 3 or older.

Shared from betternutrition.com

There is much the herb gardener can do this late in the season to be assured of abundance in the gardens in the coming year.

One important “to know” are the herbs that will self -sow (the dropping of seed in the fall that will sprout up and make beautiful new plants the coming spring/summer).

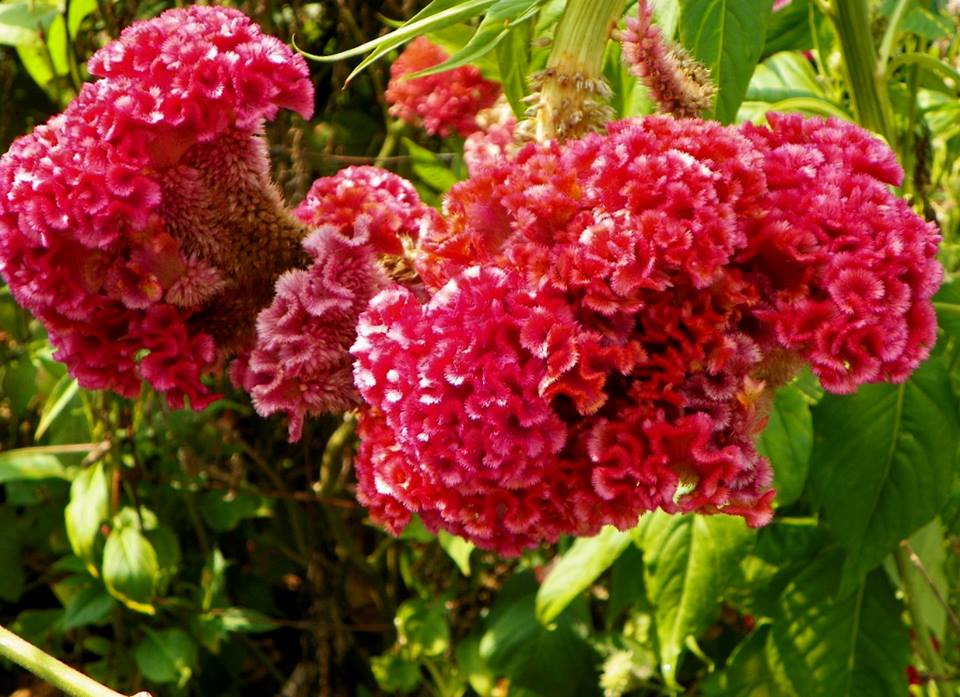
Basil, Borage, Clary Sage, Cockscomb , Coriander, Dill, Marigold, Pot Marigold, (calendula) Parsley, and Purslane, …are the most prolific of this group.

If you live in a climate with very harsh winters…then I would suggest lightly covering your herb beds, gardens, with straw or some other medium that can be easily removed when needed. This is a method I use on all the beds at Sage Hill; protects the soil, discourages critters from digging and keeps the worst of weather from making a harsh impact.

Some seed won’t show until the new spring…but some will take root and start growing the same year they are dropped.

Don’t be surprised if the plant and /or flower from the self-seeder isn’t the same as the mother plant, they most often take on different colors and sometimes shape…does not hinder the properties.

Plants that are allowed to grow where mother nature plants them will do best…self-seeders will land in some odd places…this is the charm of the idea.

So plant where you wish to, need to, or have to…but also let some self-seeders do their natural design and you will have a signature garden to be admired.

Loving the promise of Autumn~

Autumn Promise at Sage Hill Gardens

Growing vegetables in container gardens in the fall and winter is perfect for home, office or school projects. A variety of greens and root veggies can be successfully grown in containers regardless the weather conditions.
One very important fact to be aware of before you start…make sure you are using the right size containers….any plant needs room for good root expansion, good drainage from the bottom and good soil…success is bound be happen!

Greens and root herbs are the way to go with fall gardening. When you plant in mid to late August, September, or early October, germination can actually happen more quickly since the ground is still warm. However, you may need to wait a few extra weeks for maturation if you’re in a cold winter climate. Some of the best plants to grow in your fall containers are these hearty greens and herbs:

1. Arugula: These greens are so hearty, incredibly easy to grow, and since they’re also super expensive at the grocery store, growing them at home is both tasty and frugal. Arugula is great in fresh green salads or on sandwiches instead of lettuce.

2. Kale: A hearty and lovely green, kale thrives in fall and winter in all but the coldest climates. It’s somewhat cold tolerant, so it will survive early winter gales. But bring it inside if the frost is persistent for several weeks in a row. (In the SE region no worries)

3. Spinach: Another hearty green, spinach is a favorite for salads and savory baked meals alike. Spinach won’t survive the harsh winters of the Northeast, but will tough it out through the seasons in the rest of the U.S.

4. Turnips: Root vegetables are a great choice for the cooler container gardening months. Deep in the soil of your larger container pots, turnips will keep warm and thrive. And they’re also a great addition to those oven-roasted winter vegetable mixes.

5. Carrots: A family favorite, carrots survive larger containers by keeping warm deep in the soil. If it’s possible, you might even try burying your container in the soil to keep it even warmer. Carrots are great raw or roasted or even grated into sweet treats like carrot cake and muffins.

6. Herbs that compliment fall and winter food gardens and menu choices are; rosemary, sage, and thyme. Rosemary can be nipped if frost is severe and over a continued period of time…so keep check and shelter it if needed.

Replace all soil from the previous year in container growing…nutrients leach drastically from containers and dead soil will give you dead results.
Water on a scheduled system, water deep and allow drying almost completely before watering again.

Container Growing

A water (moisture) gauge for container plants is imperative for the best results with container growing.

Also a must is regular feeding…simply add fresh compost or Organic feed of your choice to the top layer of your containers at least every 4 to six weeks…Every two weeks is really my choice.

** Keep in mind…while container growing can be successful inside the home…for any plant to grow and produce well you must have a balance of good lighting for at least 6 to 8 hours every day…on the porch, in a solarium, cold frame or very lightly heated greenhouse works better than inside a residence.

I believe I speak for many of us gardeners when I say….bring on the warm weather already …please!!! She pleads while watching from the office window, the huge, beautiful, snowflakes falling from the sky!

Sage Hill has a lot of new projects to share once spring arrives and construction can take hold.

Beds and plots are all in tip top condition and ready to plant.

We are also growing some things in the greenhouse this year that are new to our growing list, follow along and see our success…or not !

Lemongrass and ginger are two of the newbies. Going to be an interesting summer. 🙂

garden ready

Some reconstruction happening on the SH website, still much to be added and changed.

A new blog for your pleasure and need to know things, ‘good things.’ 🙂

I found this article to be very good reading, most of it we all know, but kinda updates all that knowledge and puts it into better focus.

http://www.fooddialogues.com/foodsource/topics/biotech-seeds?gclid=CN-9saTf3rUCFQ4GnQodljMACA

Ok, while waiting for spring I’m headed out to wander in the snow 🙂

Enjoy, whatever is happening in your world today~

Bea Rigsby-Kunz
Culinary Herbalist/teacher/speaker

The Concept of Sustainable Agriculture

Sustainable agriculture integrates three main goals: Environmental health, economic profitability, and social and economic equity.

Sustainable promotes the principle that we must meet the needs of the present without compromising the ability of future generations to meet their own needs.

Sustainable means to be constantly aware of our actions toward the soil, water, air, energy, and the human connection to all of these concerns.

For far too many years we have been depleting our major resources and replacing nothing.

Giving back, putting back, better than what we take is the only way to ensure that next year or in ten years or 100 years, the earth will still be caring for us as it has for all of time.

Happy growing!

Bea Kunz

NOTICE: You may reprint this article by giving credit back to the author and by using it as written.

Growing by the “Raised Bed” Method
~Why and How

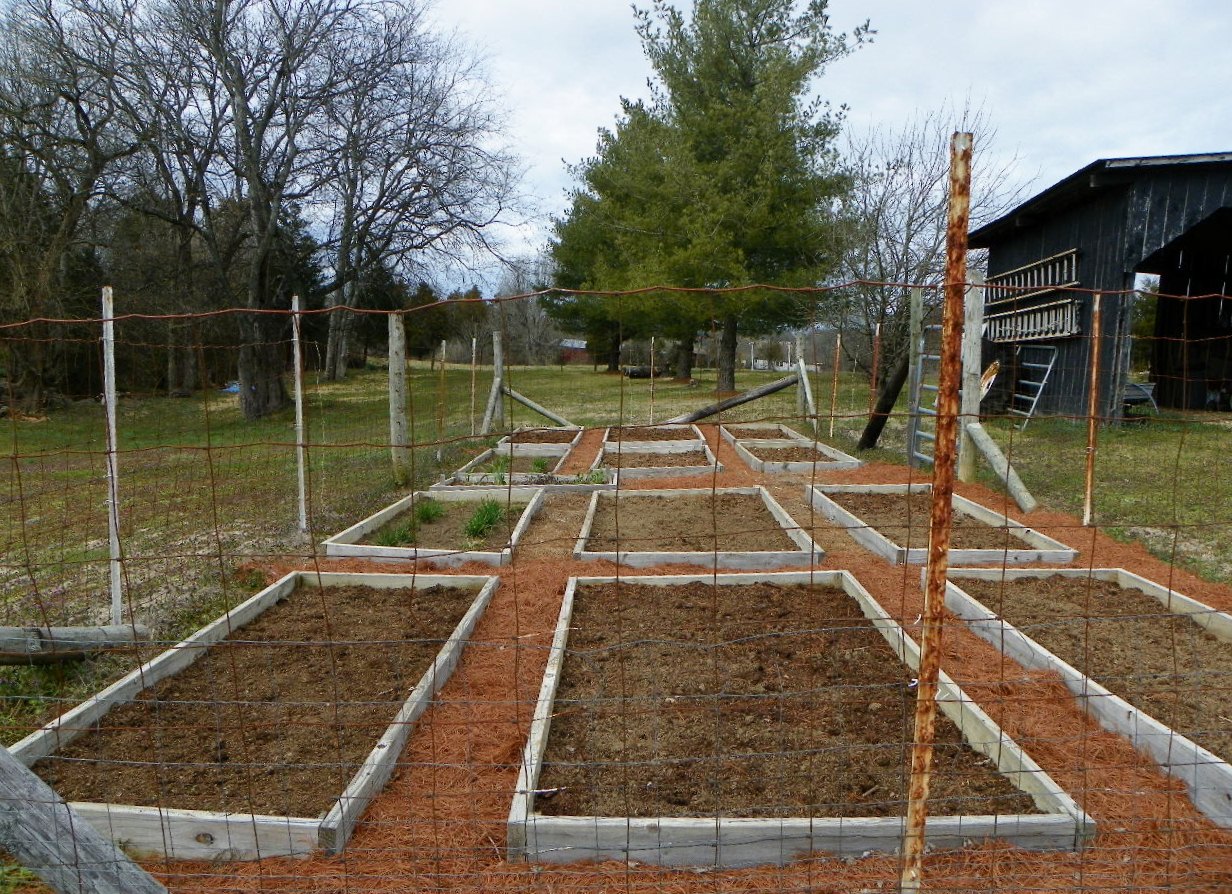
A raised bed method of gardening has taken root and for many it’s a simpler and safer way of growing. From small kitchen gardens to fields of produce for market, raised beds are here to stay.

Some major reasons to consider the raised bed method:

1) When you build and enclose a raised bed, you have just cut your maintenance in half. There will be fewer weeds (if any), well draining soil, few if any pests, and the elimination of foot traffic – which is the biggest reason for compacted soil. Because of these three improvements you will have a highly attractive and higher yield garden.

2) Raised beds can be enclosed with garden timbers (cedar, redwood and cypress) brick, block and rock will all fit the plan perfectly. I like 4x 8 size beds for the ease of working it from side to side without constant moving from one side to the other.

Now, for the layering process. Just think of it as making a Dagwood sandwich.

The area where your garden will be should be cut as close to the dirt as possible with your lawn mower.

Build your frame around the plot to your desired size.

You are now ready to build your soil.

Fall is the best time…..let it compost over the winter.

1) Right on the freshly mowed site, layer about 10 sheets of wet newspaper (no glossy colors) or cardboard. Wetting the paper or cardboard will hold it in place and speed up the process of composting.

2) On top of this add 4 to 6 inches of barn manure in some stage of composting.

3) Add to the manure 3 to 4 inches of dried leaves, grass, and other yard clippings.

4) Add 1 to 2 inches of peat-moss to the top.

Repeat this layering process until you have a depth of 12 to 24 inches. More if you wish.

The more layers you build the higher your soil line will be. Twenty four inches is the standard for most. You don’t want your soil line higher than the frame of your bed.

Once your beds are layered, water well and cover with a plastic tarp if so desired. Check from time to time and don’t allow the beds to dry out for long periods of time. (I leave mine open so they get the rain water and the natural weather cycles….it all helps the process.)

This method attracts microbes, earthworms, etc., that do the same work as a garden pick and tiller, and fertilizers at the same time. Come spring, just plant right into your ready made soil.

Remember too that you can compost all your kitchen scraps such as peeling from vegetables and fruits, coffee and tea grinds, and egg shells. Do not compost meat, bones, oils, or any cooked food. This will rot and draw animals and insects to your garden.

You can add these kitchen waste products directly to your beds, but I prefer to have a compost pile and process it separate from the beds.

For a healthy garden site always rotate your crops yearly and in the case of cucumbers, tomatoes, and eggplants, every 2 to 3 years. This stops pest from setting up house-keeping and over-wintering to wait for the new crop.

A good step to take before you start to build your beds is to have an idea of what you will be growing so you can add material to your beds that a certain crop might need. (Sand, blood/bone-meal, etc.)

Companion planting is a perfect crop practice. We will cover this in another segment.

Happy growing!

Bea Kunz

NOTICE: You may reprint this article by giving credit back to the author and by using it as written.