

Growing Garlic~
There are two types of garlic, Hardneck and Softneck.
Softneck is what we see in most markets and frankly is much better in all aspects in my thinking.
Softnecks also tend to keep longer once harvested than hardnecks. Break apart a large head of garlic, and plant only the biggest cloves. The bigger the clove, the greater the likelihood it will yield a nice, big head of garlic. Save the smaller cloves to use in the kitchen.
Planting~
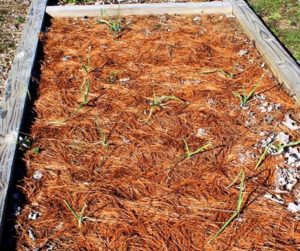
To plant, place the cloves 4 inches apart in a loose, well drained bed, sectioned off in rows. Hold each clove pointed end up, and push it into the soil about 2 inches deep. After all the cloves are in the ground, smooth the soil surface using your fingers or a rake to fill in the holes, and water well. If you’re planting more than one variety, be sure to label each one clearly. I also make a map of my planting, in case the labels go astray. I wait to mulch for a month or more after planting to give the soil a chance to cool down. When it’s leaf-raking season, I put several inches of chopped leaves over the bed.
Depending on your location and growing times…garlic can be planted in late summer or very early spring. Sage Hill is located in the southeast…middle/south Tennessee…..I plant in late summer and harvest May-June.
Fertilizing and Watering
Top growth starts in earnest in spring, when the weather warms and the days lengthen. I fertilize twice with a solution of liquid kelp and fish emulsion: once, when the garlic has started growing strongly—about mid-April—and, again, a month later. Garlic isn’t greedy for water, but it doesn’t like to dry out, either. When the soil feels dry an inch below the surface, it’s time to water. In mid- to late June, I stop watering. By that time, the garlic has sized up and the heads are starting to form cloves.
Harvesting
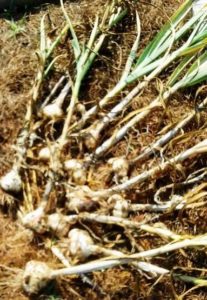
Harvest in late spring or early summer when the plants have five or six green leaves, with no more than one or two beginning to turn brown. Each green leaf represents a wrapper layer surrounding the head. During harvest, you’re liable to damage the outer layer. Later, while cleaning the heads, you’re apt to lose another one or two layers. Your goal is to end up with two or three tight, papery layers enclosing each bulb.
To harvest, drive a garden fork beneath the plants (be careful not to damage the bulbs), gently pry them loose, and then pull them out. Shake off any excess soil, and lay the plants in a pile. As soon as you’ve finished harvesting, move the plants to an airy location that is protected from sun and rain. If you’re growing more than one variety, keep each variety separate and well labeled so that you know what’s what.
Cure, clean, and store the heads
To cure garlic in preparation for storage, hang the bare bulbs with their foliage in bundles or spread them out on a table or rack. You can begin eating them right away, but bulbs intended for storage must be cured.
After a few weeks of curing, it’s bulb-cleaning time. Trim the stalks to 12 inch above the bulb, and trim the roots close to the bulb. Rub off the outer layer of skin around the bulb, and use a nailbrush or toothbrush to gently remove any soil clinging to the base. Try not to remove more wrapper layers than you have to. Store the bulbs in a well-ventilated, dark spot. If you want, set aside the biggest bulbs for planting in the fall
